
Bottom Lash Extensions: The Secret to a Balanced and Beautiful Gaze
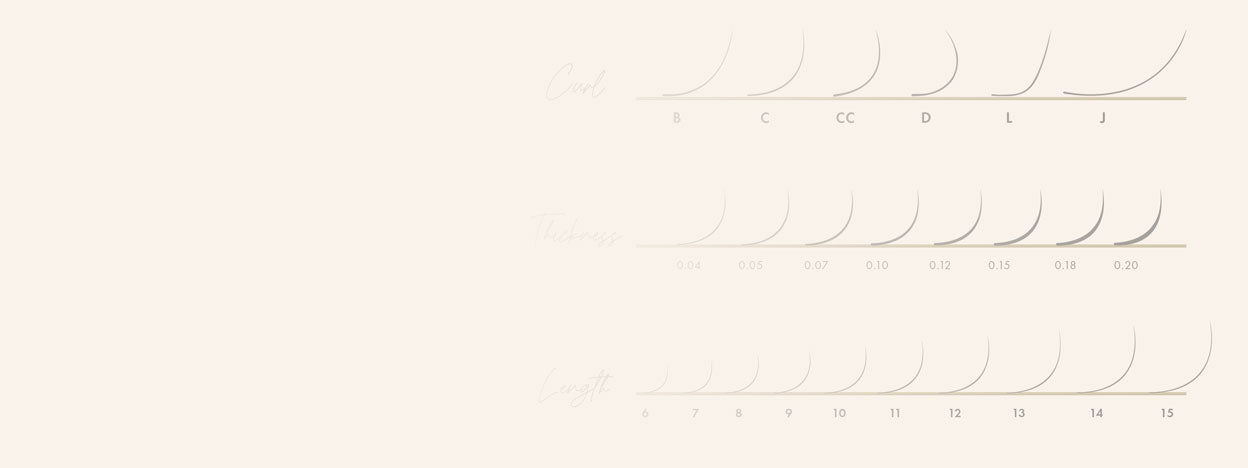

Table of Contents
The Ultimate Guide to Bottom Lash Extensions: What They Are and How to Apply Them
Bottom lash extensions are individual extensions attached to the natural lashes along the lower lash line. They add definition and help balance an upper lash set without the need for bottom-lash mascara. For Lash Technicians, the key is choosing lightweight extensions, assessing the natural lower lashes, and using careful isolation with the client’s eyes comfortably closed.
If you’re already an avid lover of London Lash, you’ll know that we're always at the forefront of the latest trends and techniques in the lash industry. While most are familiar with eyelash extensions on the top lash line, there's another option capturing the attention of lash enthusiasts everywhere: bottom lash extensions. This delicate addition to your clients' treatment can transform their final look, offering a balanced and beautiful finish that’s hard to ignore. If you want to learn everything you need to know about bottom lashes to elevate your lash game to new heights, read on!

What Are Bottom Lash Extensions?
While top eyelash extensions have long been popular, bottom lash extensions can complement them to achieve a full and balanced look. But what exactly are bottom lash extensions?
Bottom lash extensions are precisely what they sound like—individual extensions applied to the natural lashes of the lower eyelids. Just as with upper lash extensions, these are attached using the Classic lash extensions technique, with one extension attached to one isolated natural lash. The result? A more defined gaze that accentuates the eyes from every angle. When done correctly, they can beautifully frame the eyes, adding depth and dimension without looking overdone. Whether you're aiming for a soft, natural enhancement or a bold, captivating look, bottom lash extensions can be tailored to your client’s preferences.
Bottom vs. Top Lash Extensions: What’s Different?
| Feature | Bottom Lash Extensions | Top Lash Extensions |
|---|---|---|
| Placement | Attached individually to suitable natural lower lashes | Attached to suitable natural upper lashes |
| Styling Goal | Define the lower lash line and balance the overall look | Create the main shape, lift, texture, and fullness of the set |
| Length and Curl | Usually shorter extensions with a softer curl, selected for the natural lower lashes | A wider range of lengths and curls, selected for the natural lashes and desired style |
| Application | Typically Classic 1:1, following the downward direction of the lower lashes | Classic, Hybrid, or Volume techniques, depending on the set |
| Suitability | Requires enough healthy lower lashes and comfortable separation from the upper lashes | Requires an assessment of natural lash health, eye shape, and treatment suitability |

Incredible Manga Lashes With Bottom Lash Extensions by @lash.lavida
When to Offer Bottom Lashes
Although eyelash extensions already give the illusion of a widening effect that balances out the eye, lower lashes can take your clients' lash sets to the next level. Let’s imagine a Doll Eye or Dolly lash map that involves applying your longest lashes towards the middle portion of the eye, and envision pairing this eye-opening style with bottom lashes! This pairing is a match made in heaven; it offers a natural but striking look that enhances the appearance of the lashes.
Bottom lashes can be an especially flattering add-on when your client is getting a more dramatic set, such as Kim K lashes, Manga lashes, and Mega Volume lash extensions. Balancing a fuller upper lash line with bottom lash extensions can really make the eyes pop! Many lash styles can be complemented by lower lashes, provided the client’s natural lashes and eye area are suitable.
Bottom lashes are a great option to discuss with clients who love a defined lower lash line or regularly wear bottom-lash mascara. They can also be a lovely addition for clients getting their lashes done for their wedding or another special occasion. A trial appointment gives you time to check that the finished look and feel suit them before the big day!

Manga Lashes With Bottom Lash Extensions by @mei_studio_syd
When NOT to Offer Bottom Lashes
Unfortunately, not every client is an ideal candidate for bottom lash extensions. When clients have very short, weak, or damaged lower lashes, it may be best to leave them bare rather than add weight they cannot comfortably support. Applying extensions to unsuitable lashes can put more strain on them, and retention may also be poor.
Upward-pointing lower lashes need careful assessment too, as extensions could interfere with the upper lashes or cause discomfort. Consider the client’s eyelid position, skin folds, and natural lash direction individually. If you cannot comfortably separate and access the lower lashes while keeping the eyes closed, do not proceed. Suitability should be based on the individual assessment, rather than the client’s age.

Which Lashes Should You Use for Bottom Lash Extensions?
As you may have guessed, bottom lash extensions require more of a delicate touch, given the short and fine structure of the lower lashes compared with the top. Generally speaking, bottom extensions should have a softer curl to follow the natural lower lashes. Your clients' bottom extensions should usually be shorter, lighter, and less curly than their upper extensions. With this in mind, we need to choose the right length, curl, and weight. So, what lashes should you use?
For length, shorter extensions around 4–7 mm can provide a starting point, depending on the natural lash. A subtle extension of around 1 mm may be enough to create definition without making the result look too long. These measurements are a guide, rather than a fixed map for every client.
For diameter, 0.10 mm extensions may be an option where the natural lash can support them, but they are not automatically suitable for every lower lash. Assess the combined length and weight carefully, and choose a finer or shorter extension—or leave the lash bare—where necessary. The desired look should never outweigh the natural lash’s ability to support it.
For curl, a B or J curl can help create a softer finish that follows the lower lash direction. Choose from the available lash lengths and curls according to your client’s natural lashes and your training.

How to Apply Bottom Lash Extensions
Bottom lash extensions are applied in a similar way to upper eyelash extensions. However, you’re working with the opposite lash direction! This may seem tricky and fiddly at first, but once you get the hang of it, you’ll set the pattern for the rest of the lower lash set. The main thing to consider is following the natural direction of the lower lashes, so the extensions blend with them without touching the skin.
This guide is intended for trained Lash Technicians. Keep the client’s eyes comfortably closed throughout adhesive application and follow your training and the instructions for your adhesive and preparation products.
Preparation
Like with any eyelash extension set, you should prep the lashes thoroughly so that there is no dirt, sebum, or oil left behind to affect retention. If you’ve pretreated the upper lashes, there’s no reason not to prepare the bottom ones too! If bottom extensions are part of the planned appointment, include both lash lines in your preparation.

Begin by separating the top lashes. Depending on your training and the client’s anatomy, use suitable lash tape or a dry eyepatch to keep them out of the way without lifting the eyelids open. Position suitable under-eye patches beneath the lower lashes, clear of the waterline. Check that the client is comfortable and that the lower lashes are visible against the patch.
A patch provides a contrasting background and helps protect the surrounding skin while you isolate and apply the lashes. It does not replace careful tweezer control. If your preparation protocol calls for Primer, apply it according to the product instructions, keeping it away from the eyes and skin.

Application
Once the eyepatches are securely and comfortably positioned, isolate each suitable natural lash and attach an individual extension, as you would in a Classic set. Compared with an upper lash set, there are usually fewer suitable lashes to work on, so the application may take less time. Allow enough time for careful isolation, attachment, and final checks rather than rushing to finish.
For a more textured result, you may be familiar with Volume fans and spikes. However, do not assume that a lower lash can support a fan because its upper counterpart can. A lightweight Classic application is a straightforward starting point, with any advanced styling guided by training and the strength of the individual lash.

Some Lash Technicians may be tempted to ask clients to open their eyes to make access easier. We strongly advise against this! Your client could be exposed to adhesive fumes and irritation, and you don’t want to risk bringing sharp tweezers close to an open eye. If you cannot access the lashes with the eyes comfortably closed, stop and reassess.
While applying the extensions, follow the downward direction of the natural lower lashes. We find it easier to reverse the lash tray so the strips are upside down. This handy trick helps if you just can’t wrap your head around holding the extension in the opposite direction—it will feel alien at first, but you’ll soon get the hang of it!
Once you’ve picked up your extension, isolate the natural lash and attach it according to your training and lash map, keeping the extension and adhesive clear of the skin. Check that no upper and lower lashes are stuck together before the client opens their eyes. If using Superbonder, follow its application instructions and specified timing.

Bottom Lash Extension Aftercare
Those beautifully defined lower lashes deserve a little care between appointments! Explain the aftercare routine before your client leaves, including when they can first wet their lashes according to the adhesive system used.
- Cleanse the lashes gently with a suitable lash cleanser, following the product instructions.
- Avoid rubbing, picking, or pulling at the extensions.
- Skip mascara on the lower extensions unless your technician specifically advises otherwise.
- Contact the technician if an extension twists, catches, or feels uncomfortable rather than trying to remove it at home.
- Arrange a review or maintenance appointment based on how the lower set wears.
Bottom Lash Extensions: Frequently Asked Questions
Can you get eyelash extensions on your bottom lashes?
Yes! A trained Lash Technician can attach individual extensions to suitable natural lower lashes. The appointment should include an assessment of lash strength, growth direction, and whether the eyes can remain comfortably closed during application.
How long do bottom lash extensions last?
Wear time varies with the natural lash cycle, attachment, aftercare, and habits such as rubbing the eyes. Lower extensions may need attention sooner than the upper set, so avoid promising that both will last for exactly the same period. Your technician can advise on maintenance after seeing how your lashes wear.
Which lengths and curls are used for bottom lash extensions?
Short lengths around 4–7 mm and softer curls such as B or J can be starting points. The final choice depends on the natural lash length, strength, and direction. A shorter or finer extension may be more appropriate for delicate lashes.
Can bottom lash extensions look natural?
Absolutely! Short, lightweight extensions that follow the natural lower lash direction can add gentle definition. You don’t need a dramatic map to make an impact—a little extra detail can balance the whole set beautifully.
Can you wear mascara with bottom lash extensions?
One of the main benefits is getting lower-lash definition without mascara. Mascara can make cleansing and separation more difficult, so discuss suitable makeup and aftercare with your technician rather than applying it over the extensions.
Can you apply bottom lash extensions yourself?
Professional extensions require precise isolation and adhesive application while the eyes remain closed. They should be applied by a trained technician rather than attempted at home.
Voila, there you have it! You now know what to consider with bottom lash extensions and, hopefully, you’re feeling inspired to explore them with the right training. Whether you're a Lash Artist looking to expand your skill set or a beauty enthusiast eager to discuss the look with your technician, bottom lash extensions offer another way to personalize a lash set. Let us know how it goes, and don’t forget to tag us in your gorgeous lash creations over on Instagram! If you can’t already tell, we love a fresh set of fluffy lashes.
If you’re new to London Lash and are not well-versed in what we do as a brand, welcome! We’re excited to introduce ourselves. To learn more, explore our educational blog posts and our socials.


