FREE STANDARD SHIPPING FOR ORDERS OVER $170!
FREE STANDARD SHIPPING FOR ORDERS OVER $170!
New In
Glues & Liquids
Ebooks

Lash Mapping 101 | The 4 Lash Maps Every Lash Tech Should Know
May 19, 2023 5 min read
The Four Fundamental Lash Mapping Styles You Need to Nail!
It seems as though new lash mapping styles pop up every week on socials, with clients wanting more spikes, wispier lash sets, or a more natural look. Before you take a deep dive into the world of more daring lash maps, there are four basic styles that you will use time and again as a base for any trending lash style! Here are those styles, and which clients they will suit the best.
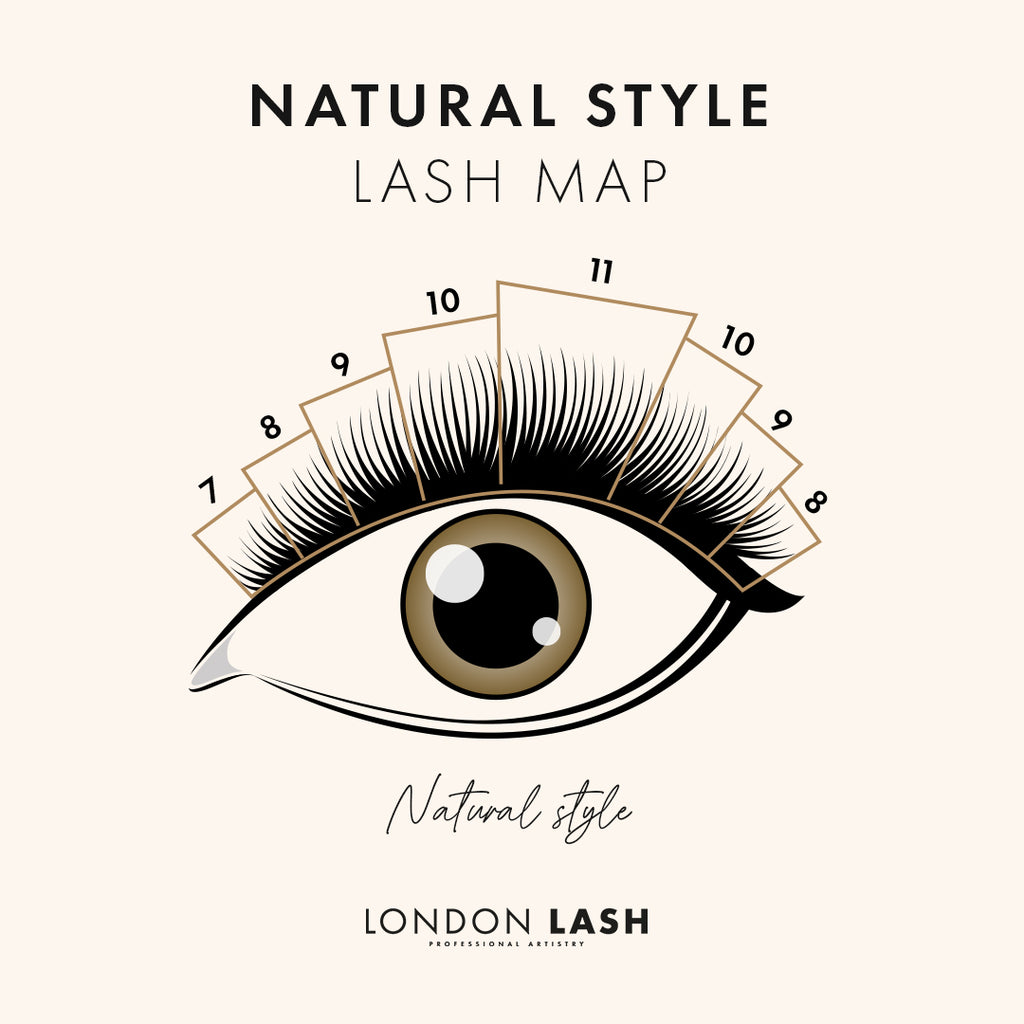
Natural Lash Map
This is the easiest lash map you will ever learn, and it will suit absolutely any client without fail! The reason that this lash map is so universal is because it follows the growth pattern of the lashes and the arch of the brow. It’s in between a Doll Eye lash map and a Squirrel lash map, so is very natural, and wearable for everyone.
If you want to keep a lash extensions set looking very natural, choose C curl lashes and shorter lengths, for example 7mm - 10mm only. When it comes to lash curls, choose the one which best mirrors your client’s lashes so that the extensions blend in seamlessly.
With this as a base, you can create any lash style at all whilst being sure that the overall shape of the lash set will complement your client’s face shape and bone structure.

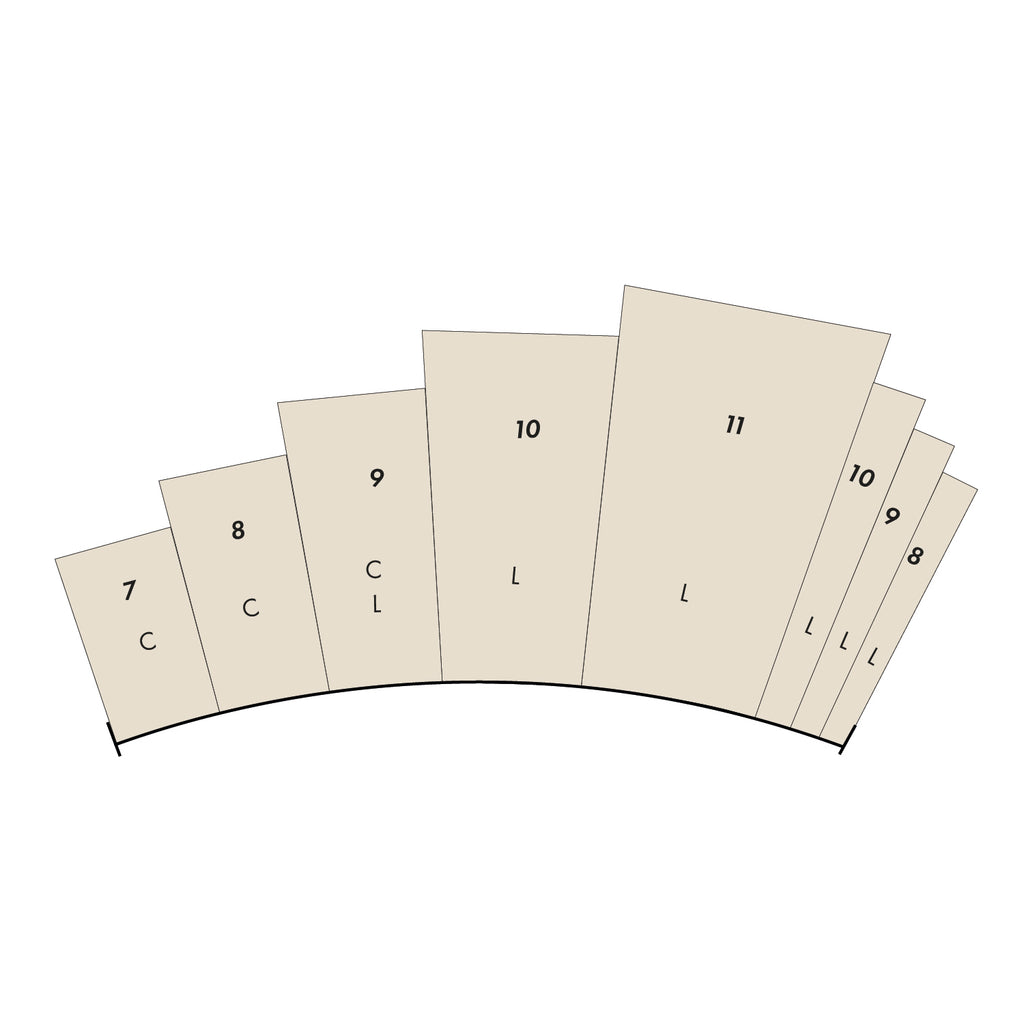
Doll Eye Lash Map
You might have heard of Doll Eye lash mapping as a Dolly style or as an open eye mapping instead, but the effect is the same. A Doll Eye lash map is characterized by having the longest lengths in the middle of the eye, tapering down to shorter lengths in the inner and outer corners. Doll Style lashes are completely symmetrical from one side of the eye to the other, and should also be symmetrical across both eyes.
Being longest in the middle, Doll Lash Maps work very well for clients who have a wide set of eyes, by which we mean the space between their eyes is wider than each eye is. The reason it works well for these clients in particular is that it creates the illusion of less space between the eyes, whereas something like a Cat style will create the illusion of more space.

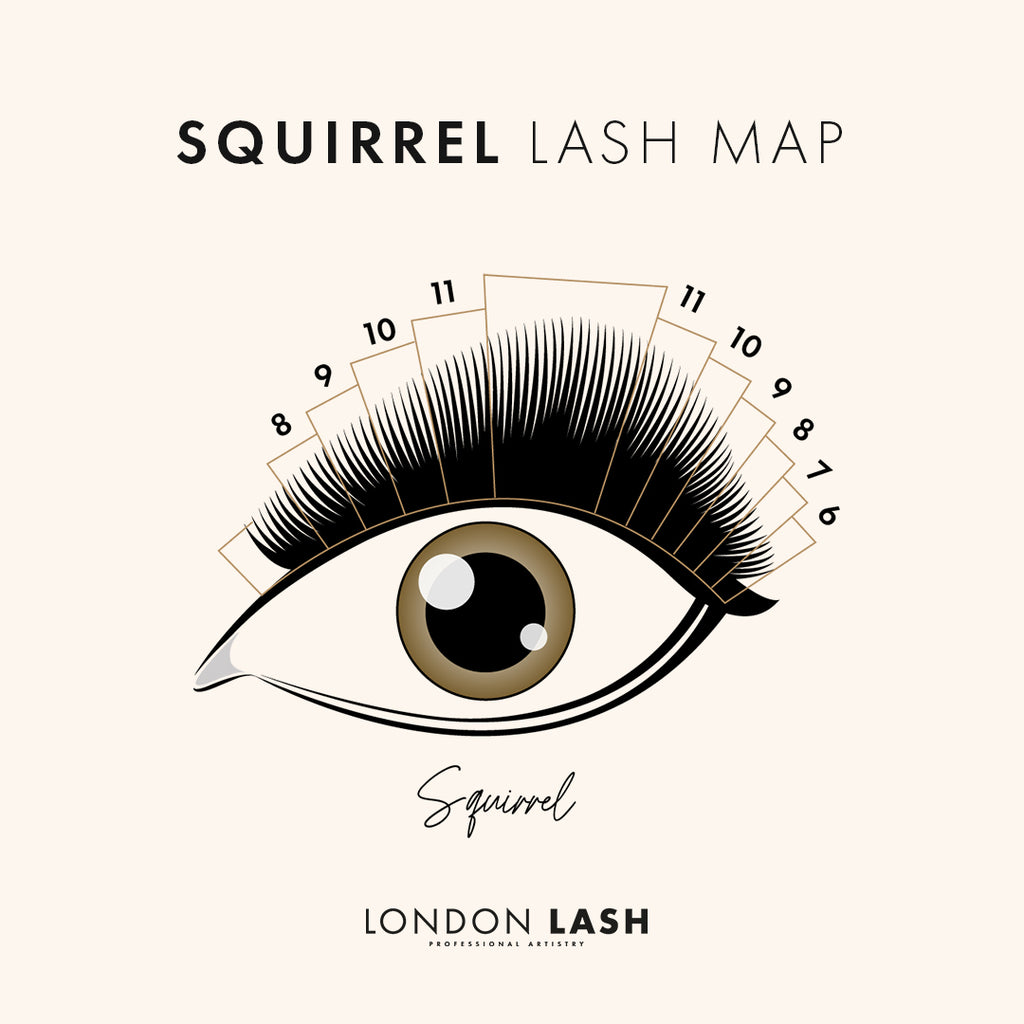
Squirrel Lash Map
A Squirrel Lash Map is quite similar to a Natural lash map, though the longer length is a little more towards the end of the lash line, and you might also use more lengths than you typically would in a Natural lash map.
Squirrel Lash Maps are a bit more universal than a Doll Eye or a Cat Eye, but we wouldn’t really call it a one-size-fits-all lash map in the same way that we would a Natural Lash Map. That being said, it does generally follow the natural growth of the lashes and is longer under the brow arch so is a good option to choose if you’re not sure which map to choose for a client, or if your client desperately wants a Cat Eye style that just wouldn’t suit their eye shape.

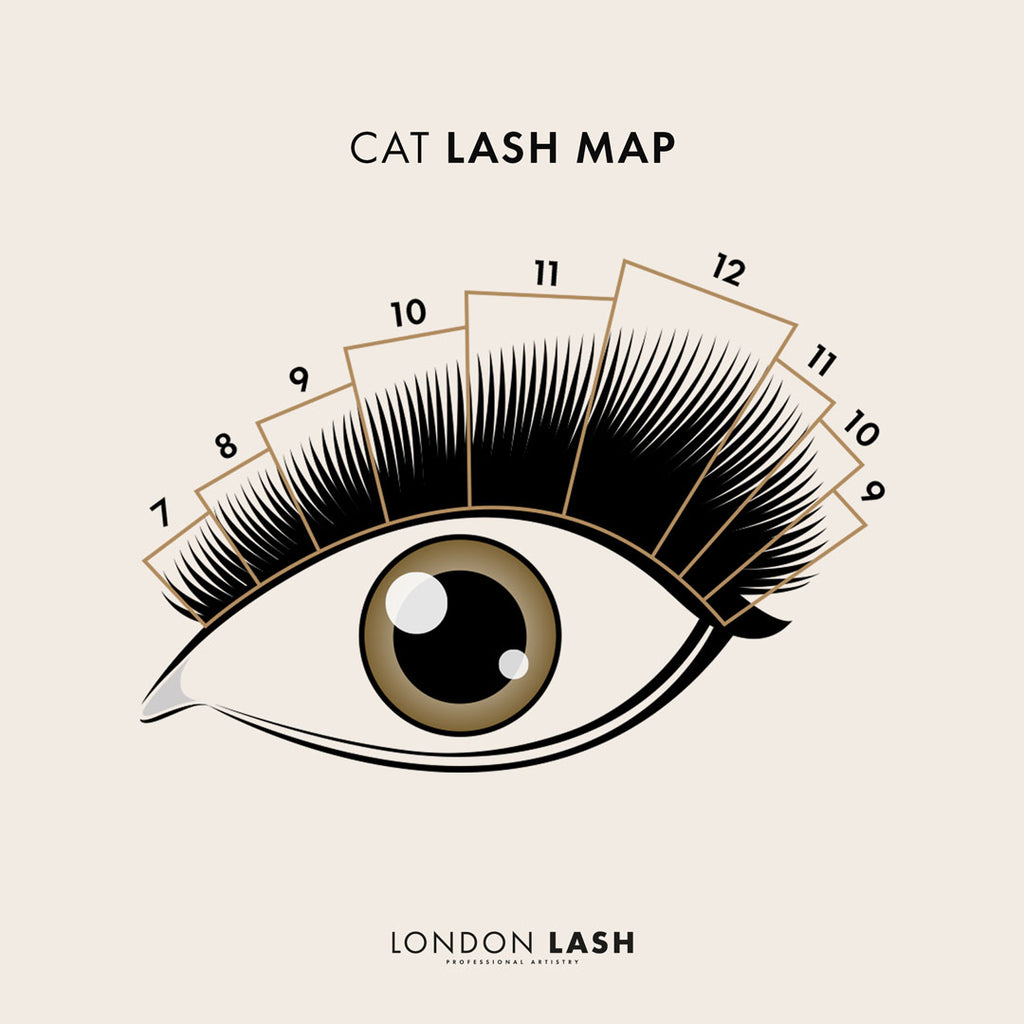
Cat Eye Lash Map
Cat Eye lash maps are probably the most common style clients are asking for, largely because clients know them by name, but also because they want to replicate that eyeliner flick we all try to achieve (hands up – who’s been late to something because they couldn’t get their flicks to match?). Cat Eye styles can be tricky to apply in a way that looks as good as we all want them to though simply because they don’t suit absolutely everyone, and while the same can be said for a Doll Eye lash map, one wrong move with a cat eye style can take your clients lash look from sexy to sad.
A Cat Eye lash map is characterized by having the longest lengths near the outer corners of the eye. We recommend dropping down a couple of lengths in the outer corner just to keep those lashes right at the end safe and healthy, as they tend to be shorter and finer than the lashes throughout the eye so can’t really hold as much weight as other lashes.

Cat Eye Lash Map Problems & Solutions
We all love a Cat Eye, but they’re probably the least universal lash map going! Rather than shy away from Cat Eyes completely (we all want to make our clients happy, right?) let’s have a look at the two most common factors that can make a Cat Eye lash map look less than perfect, and what we can do to still give our clients the look they love!
Wide Set of Eyes
Clients who have a wide set of eyes won’t generally benefit from having a Cat Eye style, as (opposite to a Doll Eye) it will create the illusion of more space between the eyes, so be careful with this. If a client with a wide set of eyes asks you for a Cat Eye style, you can do one of two things.
Either explain to them that it may not suit them due to the shape of their face and offer them a squirrel style instead, which will complement their eye shape a little more whilst still putting some extra length towards the end of their eyes, or opt for shorter lengths in your lash map so that while they do have the sexy sweep and flick of a Cat Eye style, the lashes aren’t creating such a strong optical illusion of additional space between their eyes.
Tricky Eye Shape and Lashes
Another client who isn’t as well suited to a Cat Eye map would be someone who has very downturned eyes, or who has downward growing lashes. This is for the same reason, which is that this can lead to a drooping effect, making the eyes look sad instead of vibrant. The good news is that you can work around this to some extent with your curl selection.
D curl lashes are a good option here because of their very curly nature. The only danger with these is that if your client has very downward growing lashes but heavy eyelids, D curls can be a little bit annoying for them because they can tickle the eyelids as the lashes start to grow out.
M or L curls can be a very good option, especially on downward growing lashes as they have a flat base, and then curl at a straighter, upwards angle which gives lift to downward growing lashes and to downturned eyes. M curl lashes and L curl lashes have risen in popularity over the last few years because they give a really good flick to a Cat Eye lash style whilst also giving our clients more lift, thereby making a Cat Eye style more universal than it had been previously!

And that’s a wrap! Learn these four basic maps and you’re prepared for almost any request a client can come to you with. Remember that these maps can be used as the basis of nearly any trending lash extensions styles, and are intended to complement your client’s specific face and eye shape, so work with them to choose the lash map that will make them look and feel the most gorgeous!
Subscribe
Sign up to get the latest on sales, new releases and more …


