
Wet Look Lashes Tutorial
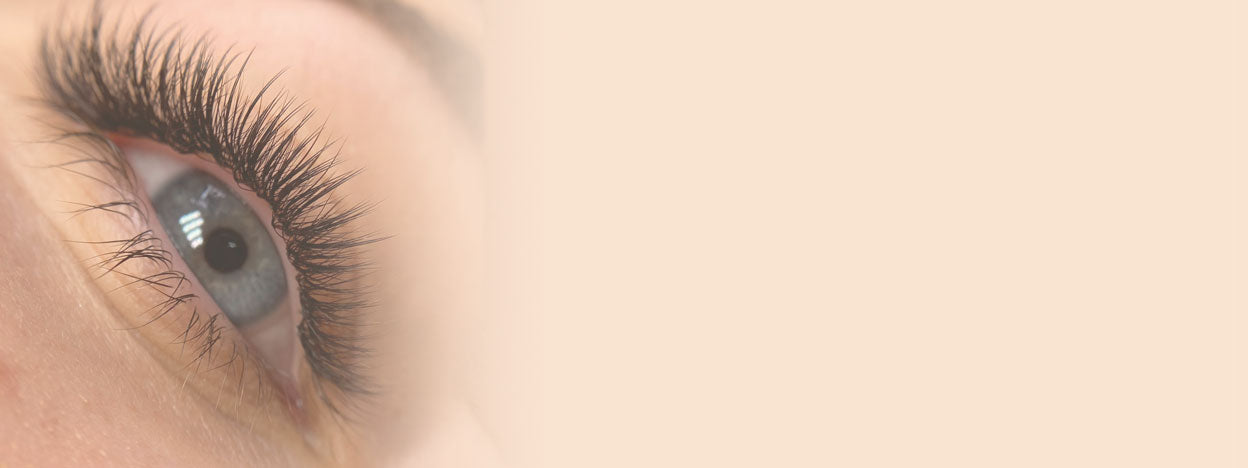

Table of Contents
Wet Look Lashes Tutorial | How to Map and Style Wet Look Lashes
Wet look lash extensions use fine volume lashes kept together as closed fans or spikes, rather than fanned out. This creates a defined, textured finish that resembles freshly wet lashes—without the lashes actually being wet!
Spiky Lashes, Wispy lashes, Kim K Lashes and Wet Look Lashes—we’re all suckers for an eye-catching spiky finish! Just to help you wow your clients and make your Instagram feed the next big thing with your signature Wet Look Lash sets, we’ve put together a little guide for you to follow to create some seriously textured Wet Lash Looks!
First Things First…
Wet Look Lashes rose to popularity in 2020 and immediately grabbed everyone’s attention. Unfortunately, it was a while before the majority of lash techs could actually work on clients in order to try out the styling, so things went a little quiet on the Wet Look front for a while. Since then though, there has been a bit of a resurgence (which we’re super happy about!)

A Wet Look Lash set breaks the rules a little bit in that it uses volume lashes, but doesn’t fan those lashes out—what you’re aiming for is closed fans or spikes.
Wet Look Lashes vs. Classic, Wispy and Volume Lashes
Not sure how to explain the difference during a consultation? Here’s a quick comparison to help your clients picture the finish.
| Lash style | How it’s created | The finished look |
|---|---|---|
| Wet look lashes | Fine volume lashes applied as closed fans or spikes. | Defined, separated texture with a freshly wet lash effect. |
| Classic lashes | One individual extension applied to one isolated natural lash. | A clean, individual-lash finish with added length and definition. |
| Wispy lashes | Contrasting lengths and spikes arranged to create texture. | An uneven, fluttery top line. Wet look sets can also be wispy! |
| Volume lashes | Multiple fine extensions opened into a fan and applied to one isolated natural lash. | A fuller, fluffier finish, depending on the fans and coverage used. |
A Note on Spikes
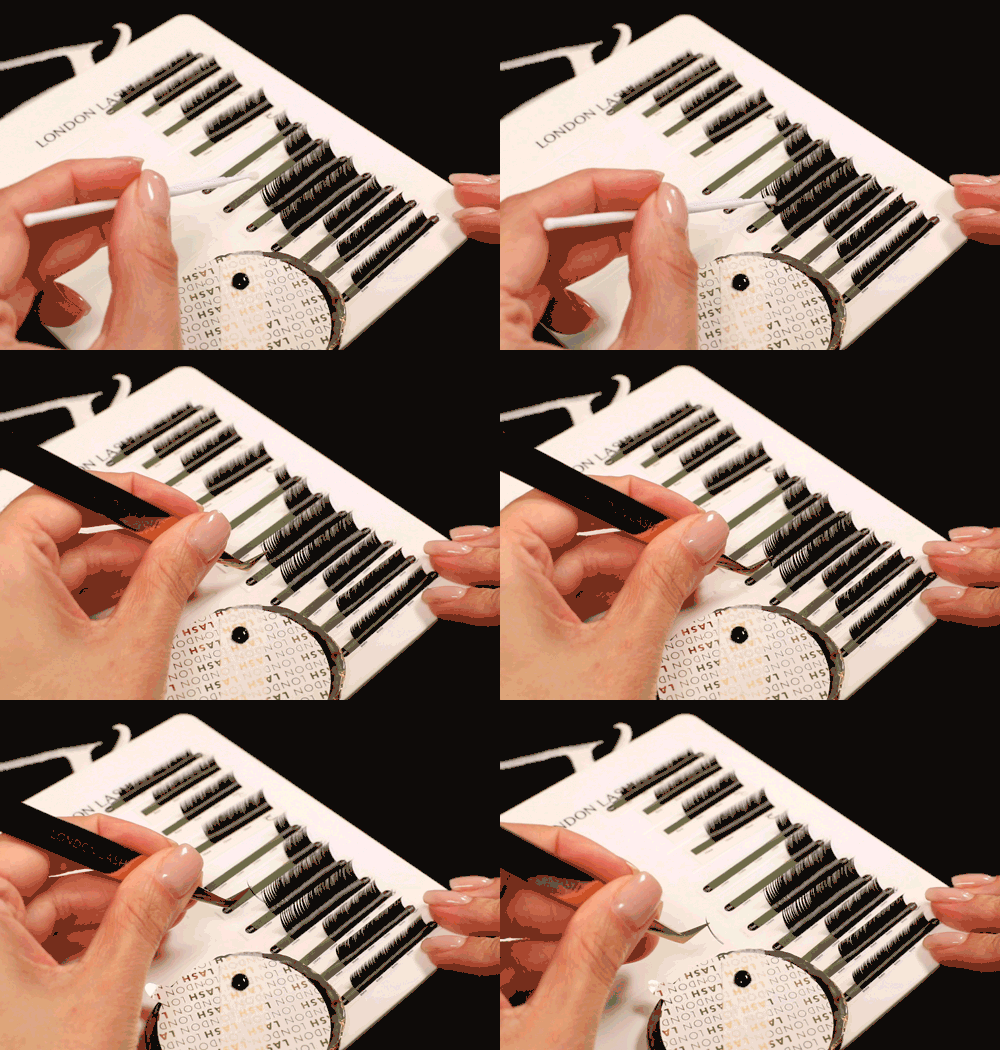
The easiest way to make spikes is to take some Eyelash Primer on a microbrush and apply it along the tips of the lashes on the strip. This will keep the tips together, making spikes much easier for you to pick up. Be careful not to get Primer on the bases of the lashes, as this will cause your lash glue to polymerize more quickly and might give you retention issues as a result.
Secondly, when it comes to spikes, we’d recommend using fine volume lashes and choosing the number of fibers carefully. The combined thickness, length and number of extensions determine the load on the natural lash—closing a fan doesn’t make those same extensions heavier. Always tailor each spike to the natural lash supporting it.
All that covered, let’s see how to create Wet Look Lashes!
Mapping
You can do Wet Look Lashes in any shape you desire—pick the mapping you’d typically pick for your client, whether that be Dolly, Squirrel, Cat, Fox or anything in between. We’re going to be working with layers, so map with the knowledge that you’re going to be applying different lengths to different layers, and account for that when you consider the lengths you’ll be using—the very first thing to consider is what length is safe to use for your client’s lashes and go from there.
A Simple Wet Look Lash Mapping Guide
Use your chosen eye-shape map as the starting point, then plan how the layers will work together. The example below shows the relative lengths within the same section of your map, rather than fixed lengths for every client.
| Lash layer | For a more textured finish | For a softer finish |
|---|---|---|
| Bottom layer | Your chosen shorter map length. | Your chosen suitable map length. |
| Middle layer | Up to 1 mm longer than the bottom layer, where suitable. | The same mapped length as the bottom layer. |
| Top layer | Up to 1 mm longer than the middle layer, where suitable. | The same mapped length as the other layers. |
Mapping tip: These length increases are optional. Shorten or adapt your map wherever the natural lashes cannot comfortably support the planned extensions, particularly around the corners.
It goes without saying that at this point, you’ve carried out your pretreatment routine and have applied your eyepatches, so now we can move on to…
Layer 1
We’re going to tell you a really easy way to work with layers in just a sec—we’re starting from the bottom layer. To do this, take a piece of eyelid tape and use it to lift the lashes back, fixing the tape to the upper eyelid at the ends. Try not to put too much pressure on the mid-section as you don’t want to stick the lashes down too hard—this will make things trickier further down the line! Take your isolation tweezers and carefully release the bottom layer of lashes.
Check that your client’s eyes remain fully closed and comfortable throughout taping and application.
Now you have your first layer, you’re going to start the application. For a really spiky, textured look, use closed lash fans on each suitable, individually isolated natural lash. If your client has sparse lashes, have no fear—we’ll give you some guidance in just a moment!

With this layer, you’ll be following your shorter map lengths.
Layer 2
Once this layer is covered, allow the adhesive bonds to set according to your adhesive’s instructions and check carefully to avoid stickies. You’re then going to take some more tape and gently hold down the lashed bottom layer. Keep the tape away from fresh adhesive bonds and rest it lightly on the lashes so that it is easy to remove later, and so that you’re not crushing the lashes on the bottom layer.
Once the bottom layer is out of the way, take your isolation tweezers again and free the middle layer of lashes. Lash layers vary from client to client. In the case where someone has four layers, you can work with the middle two together, while still isolating each natural lash individually. This will add more density and will also make the spikes on the top layer stand out more.
On the middle layer, apply your spikes 1 mm longer than you chose on the bottom layer if you want a super textured, spiky look and the natural lashes can support it. If you’re looking for a slightly less spiky set, you can apply the same mapped length to each layer and you’ll get a slightly less dramatic finish.

Now, we said we’d help you with clients with sparse lashes. If you need more coverage, or even if you just want a bit more fluff in the lash set, apply some open fans through the middle layer—not necessarily every lash as this will hide the spikes on the bottom layer, but every few suitable lashes can help soften the appearance of gaps. Each fan must still attach to one isolated natural lash; never bridge a gap by attaching an extension to neighboring lashes.
Once you’re done, check for stickies and allow the bonds to set according to your adhesive’s instructions before gently holding down layers 1 and 2 with tape. Avoid pressing the tape into the attachments.
Layer 3
This time, you can finally be rid of that tape on the eyelid! Remove it gently, checking your client’s comfort as you go. If there is any pulling or discomfort, stop and carefully release the tape rather than tugging.
On this layer, you can either apply lashes 1 mm longer than on the middle layer, or you can use the same mapped lengths, again depending on the overall look you’re aiming for and what the natural lashes can support.

Once you’re done with application, carefully remove the tape holding down the bottom two layers and check the full set for stickies. If you’re using Superbonder, apply it according to the product’s instructions, including the recommended timing and amount. Then give the lashes a gentle brush through to get everything together!
You can read more about using Superbonder in our dedicated guide.
TOP TIP: When removing your tape from the bottom layer, you might find that it has gotten a little more stuck to the lashes than you’d planned if you’ve rested your tweezers on it whilst isolating. Carefully release the tape bit by bit without pulling on the natural lashes. Keep sharp tweezer tips away from the skin and eyes, and never force tape away from a stuck extension.

Troubleshooting Your Wet Look Lash Set
- Your spikes keep opening: Check that the tips stay together during pickup and that your tweezers grip the closed fan evenly. If using the Primer method above, keep it on the tips and away from the attachment area.
- The finish isn’t defined enough: Check your set from different angles as you work. Too many open fans can hide the spikes, while carefully planned length differences can help suitable spikes stand out.
- The set looks too sparse: Consider a few lightweight open fans through the middle layer for a softer blend. Work with the client’s available natural lashes rather than increasing the load to fill every visible gap.
- You’re finding stickies: Recheck isolation, adhesive amount and your working conditions. Allow attachments to set before repositioning layers, and complete a thorough stickie check before finishing.
Other Things To Try
If a wet look on its own isn’t quite as spicy as you’d like it to be, try adding some colored spikes as well as black ones. For the most intense results, apply your colored spikes to the bottom layer. For a bit more of a subtle effect, apply to the middle or the top layers. If you really want to turn heads, apply different colors throughout all layers!
Frequently Asked Questions About Wet Look Lashes
Are wet look lashes the same as classic lashes?
No. Classic lashes use one individual extension per natural lash, while wet look lashes use fine volume extensions kept together as closed fans. Both can give definition, but wet look lashes create a more grouped, textured finish.
What’s the difference between wet look and wispy lashes?
Wet look describes the closed-fan effect, while wispy describes texture created by contrasting lengths and spikes. You can combine the two by using closed fans with carefully placed longer spikes for a wispy wet look set.
Can wet look lash extensions look natural?
Absolutely! Shorter, carefully chosen lengths and subtle differences between layers can create a softer wet lash look. More pronounced length changes give a bolder, spikier finish. Tailor the map and extension load to each client’s natural lashes.
Are wet look lashes suitable for sparse natural lashes?
They can be, depending on the condition and strength of the natural lashes and the finish your client wants. Closed fans may make gaps more noticeable, so a few suitable open fans through the middle layer can create a softer blend. Always assess the natural lashes first and explain what coverage is achievable.
Do wet look lashes need to stay wet?
No—the name describes their appearance! They don’t need water, oil or styling products to maintain the effect. Clients should follow the aftercare instructions provided by their lash technician and keep their extensions clean.


