
The Ultimate Guide to Lash Mapping! Includes FREE Lash Maps!


Table of Contents
Lash Mapping Guide: Free Maps for Natural, Classic and Textured Sets
Lash mapping is the plan a technician uses to organize extension lengths, curls, and styling across the lash line. A lash map divides the eye into sections, helping create a consistent design that can be adapted to the client’s natural lashes, eye shape, and preferred finish.
It would be very convenient if we had a one-size-fits-all lash map so that we’d be able to lash on autopilot, but the fact of the matter is that each of us has a completely unique set of eyes and a different bone structure. Due to this, it pays to map each lash set based on our clients’ individual features. If you’re not sure where to even begin, we’re here to help!
We’ll go over the main map shapes in a moment, but within those styles you can do almost anything! Make them dense, make them wispy, use Classic lashes, create a Hybrid set, or opt for Volume—the possibilities are endless!
How to Map Lash Extensions: Step by Step
- Assess the client with their eyes open: Look at eye shape, lid and brow position, natural lash direction, and differences between the two eyes.
- Agree on the desired finish: Use reference photos to establish whether the client wants subtle definition, central emphasis, an outward sweep, or a textured look.
- Choose the shape and suitable lengths: Select a starting map and assess what the natural lashes can support before deciding on the longest sections.
- Mark your sections: Once the eyepatches are correctly positioned, note the section boundaries and planned lengths without pressing on the eye area.
- Plan curls, layers, and spikes: Record where these change so you can follow the design consistently during application.
- Review both eyes: Adapt the maps where needed to create a balanced result rather than assuming identical measurements will suit both eyes.
- Save the finished map: Record the design and any adjustments on the client record so you can refer to it during future appointments.
Mapping tip: The diagrams and length sequences in this guide are examples to adapt. They do not replace an assessment of the natural lashes or the application techniques covered in your training.
Classic Lash Mapping: Does It Need a Different Map?
Classic describes the application technique: one individual extension is attached to one isolated natural lash. Natural, Dolly, Cat, and Squirrel describe the shape of the map. That means a Classic set can use any suitable map—it doesn’t have one universal length sequence.
For a natural-looking Classic set, choose a shape that follows the client’s existing lash pattern and use gentle transitions between suitable lengths. For a more noticeable shape, adjust where the emphasis sits rather than simply making every extension longer.
The same overall map shape can also be adapted for Hybrid or Volume application. The extension load, density, curls, and layering still need to be planned for the individual client.
Lash Mapping Styles Compared
| Map | Main placement feature | What to consider |
|---|---|---|
| Dolly / Open Eye | Longer lengths through the center, tapering towards both corners. | How much central emphasis and roundness the client wants. |
| Cat-Eye | Increasing emphasis towards the outer area, with suitable corner tapering. | Outer-lash direction, strength, and the intended sweep. |
| Fox / Extreme Cat-Eye | A more directional outer emphasis with shorter styling through much of the map. | Curl, placement, and whether the outer lashes can support the design. |
| Squirrel | A peak before the outer corner, followed by a taper. | Where the peak should sit on the individual eye. |
| Natural | Gentle length changes that follow the existing lash pattern. | How much enhancement is needed without creating a pronounced peak. |
Keep three decisions separate: map shape controls the overall outline, application technique determines how individual extensions or fans are applied, and top-line styling creates a smooth or textured finish.
Dolly Lash Map
A Dolly style, sometimes referred to as an “open eye” style, creates emphasis through the center of the eye. A Dolly map places the longest lengths centrally, tapering towards the inner and outer corners.
This can be useful when the client wants a rounder or more open-eyed appearance. Consider the existing eye shape and spacing during the consultation: some clients will love the central emphasis, while others may prefer a softer or more outward-sweeping design.

Cat-Eye Lash Map
A Cat style is highly coveted—everyone has heard of a cat-eye lash set, and plenty of clients ask for one, too. Compared with a Dolly map, the emphasis moves towards the outer area of the eye.
A Cat style uses shorter lengths sweeping into longer lengths towards the outer section. Taper the final corner where needed to suit the natural lashes, while maintaining that flick you’d aim for when drawing cat-eye eyeliner.

Cat styles can create a striking, elongated finish. Assess the outer corners carefully, particularly where the natural lashes grow downwards or are finer than those through the rest of the lash line.
Use Cat styling examples to discuss the effect your client wants. Their eye spacing and preferences may call for a stronger sweep, a softer variation, or a different map altogether.
If you’re confident using M or L curl lashes, these can offer different styling directions. A curl change does not make an unsuitable extension length or load appropriate, so assess the attachment fit and natural lashes first.

Fox Eye / Extreme Cat-Eye Lash Map
A variation on a Cat style is an Extreme Cat-Eye, sometimes called a Fox style. It creates a directional, eyeliner-like effect, using shorter styling through much of the eye and more emphasis towards the outer area.
The effect comes from the combination of map, curl, and placement—not simply adding extra length to the outermost lashes. As with a Cat map, assess those corner lashes carefully and adapt the design to their direction and condition.

Squirrel Lash Map
A Squirrel style is a versatile starting point, with the longest section sitting before the outer corner and tapering down towards the end. A Squirrel map can follow the natural sweep of the lash line, with the brow arch offering one visual reference when planning the peak.
It still needs to be adapted to the individual eye rather than treated as one-size-fits-all. Compare the effect with a Dolly or Natural map during the consultation. If the client wants softer definition, you can also discuss a natural-looking brown lash set.

Natural Lash Map
A Natural map follows the client’s existing lash pattern, using gentle length changes rather than a dramatic peak. You can think of it as a softer blend of Dolly and Squirrel characteristics, adapted to the person in your chair.
In the example below, the longer lengths are spread through a broader central area rather than concentrated into one pronounced point. Using fewer length changes can help create a less obvious arch to the finished shape.
For a natural look, keep the corners delicate and choose lengths relative to the client’s natural lashes. “Natural” doesn’t mean using the same millimetre range for everyone—a map that looks subtle on one client may look much more noticeable on another.
This approach works well as a starting point for a Natural Classic lash map, but it can also be adapted for a softly styled Hybrid or Volume set. Agree on the density, color, and curl alongside the shape.

How to Play With Your Top Line
Lash maps don’t mean you can’t have fun with the lashes themselves—while we advocate mapping to help create balance across the eyes, one thing we’ll never advocate for is boring lashes! We never want every lash set to look the same, after all.
Once you’ve chosen the shape, you can use the layers of the upper lashes to create different top lines. The examples below illustrate the principle; natural lash direction, layer spacing, curl, and attachment position all affect the result.
A More Even Top Line
For a more even top line, as seen in traditional Russian Volume styling, you can use longer extensions on the bottom layer and shorter extensions as you move upwards.
Let’s say a suitable example section uses 11 mm on the bottom layer, 10 mm on the middle layer, and 9 mm on the top layer. This can help align the visible tips, but adjust the sequence to the client rather than assuming it will produce an identical result on every eye.
Our guide to working with lash layers explains the technique in more detail.
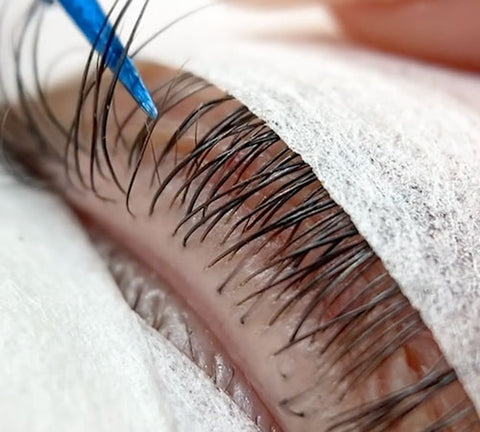
A Softer, Natural Top Line
For a softer finish, try using the same mapped length on each layer. Differences in the natural lash positions can create a little texture along the top line without an especially pronounced spiky effect.
A Wispy Top Line
For those who love a wispy finish, you can reverse the even-top-line approach. In an example section, that might mean 9 mm on the bottom layer, 10 mm in the middle, and 11 mm on the top layer, where the natural lashes can support those choices.
This helps create length contrast between layers. Adjust the differences and density to suit how soft or textured your client wants the finish.
The Kim K Effect
To create that highly sought-after Kim K effect, map in spikes at balanced intervals throughout the set. You can combine these with different base top lines depending on the result you want.
One way to prepare closed spikes is to apply a small amount of suitable primer to the tips of volume fibers on the strip, keeping it away from the attachment bases and following the product instructions.
A spike might be 2–3 mm longer than the surrounding extensions in a dramatic example, but that difference is optional. Choose the spike’s length and combined fiber load according to the supporting natural lash. You can also create contrast by shortening the surrounding lashes rather than extending the spike further.

Now for the Fun Part…
You didn’t think that was all, did you? There’s basically no end to what you can do with lash extensions. Now you know the main shapes and ways to create different top lines, why stop there? Try adding in color to complement your client’s chosen look or turn heads as they walk down the street.
A little pop of color near the outer corner is an effortlessly cool way to take a lash set to the next level. Making the spikes in a wispy set with colored lashes can be fun for you and your client too.
If you’re feeling extra adventurous, play around with which lashes you’re using. Mix premade fans with handmade closed fans to create texture, and consider suitable flat lashes for a defined finish, like we did in this lash set. Assess each extension or fan individually so the mixed techniques remain appropriate for the natural lashes.

Here’s the map for this set, if you’d like to use it as inspiration:

Frequently Asked Questions About Lash Mapping
What Is a Lash Map?
A lash map records the planned extension lengths, curls, and styling positions across the lash line. It helps the technician follow a design during application and keep a useful record for future appointments.
Which Lash Map Creates a Natural Look?
A Natural map is a useful starting point because it follows the existing lash pattern with gentle transitions. The final effect also depends on length, curl, color, and density—not the map name alone.
Can the Same Map Be Used for Classic and Volume Lashes?
Yes. The overall shape can be adapted for either technique. Classic and Volume describe how extensions are applied, while the map describes their planned arrangement. Extension selection and density must still suit the natural lashes.
Should Both Eyes Use Identical Lash Maps?
Not always. Differences in eye shape, lash direction, and natural coverage may require adjustments to create a balanced result. Assess both eyes with the client’s eyes open before finalizing the plan.
How Do You Choose Suitable Lash Extension Lengths?
Assess the natural lashes and the client’s desired finish before setting maximum lengths. Consider the diameter and number of fibers as well as length, and adapt the map around finer lashes and corners rather than forcing every natural lash to match a fixed sequence.
When it comes to lashes, the world—as they say—is your oyster. Go out there and get creative! We don’t know anyone who doesn’t love something that’s unique to them, so why not be known for being the most creative lash tech in town? Check out Part 2 for more free lash map examples!
Check out these featured products


Sale
