


4 Ways to Include Colored Lashes in Your Lash Sets
How to Add Colored Lash Extensions Into Your Lash Mapping Styles
From subtle classic eyelash extensions to the most eye-catching sets of volume eyelash extensions, a little pop of colour can really take your work to the next level! If you haven’t used them before, or you’re not sure your clients will be brave enough to opt for coloured lashes it can feel a little bit risky. Here are three ways that you can incorporate coloured eyelash extensions into your lash sets that you might not have thought about before…
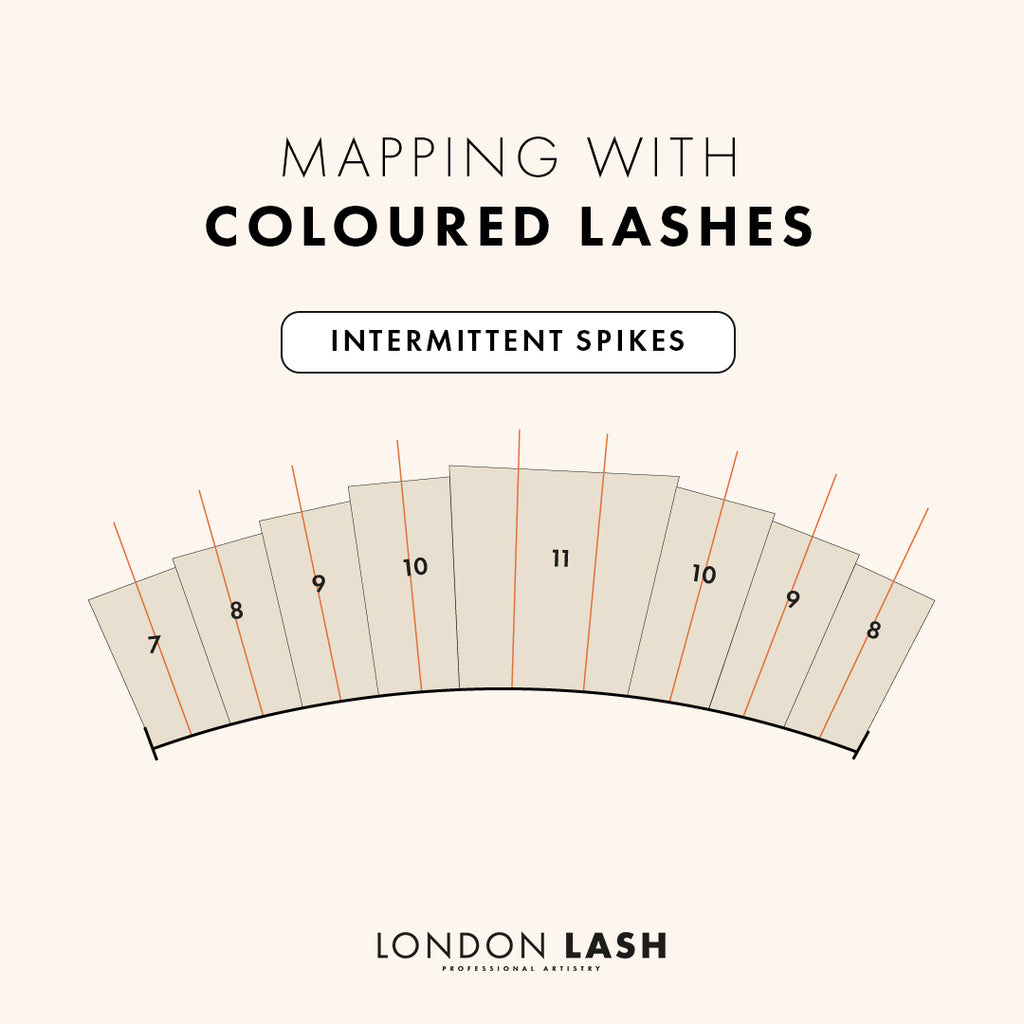
Style One: Intermittent Spikes
This one goes hand in hand with our clients’ desire for wispy hybrid lash sets, or even in a classic or volume set – our coloured eyelash extension collection comes in both 0.07 for volume fans up to 5D, and 0.15 for classic lash sets. This means that you can incorporate them into any type of lash set you’re creating.
With intermittent spikes, you’re going to start off by mapping the lashes using any basic shape that best suits your client. Once you have your map down, take a different coloured mapping pen and map out where your spikes will go. For the best look, keep your spikes at regular intervals, and to keep the set looking good for longer, it’s good practice to add a spike to the top and the bottom layer so that if one of the spikes falls out before the client’s fill, they still have a spike there and not a gap.
To really make your spikes stand out, and to give your client that swoon-worthy wispy eyelash extension textured look everyone’s into right now, opt for lashes that are 2 mm longer than the other lashes in that section of the lash map.
If you really want to make an impact, you could add a mixture of coloured lash extensions – as long as your client is happy to experiment, don’t be afraid to get creative!
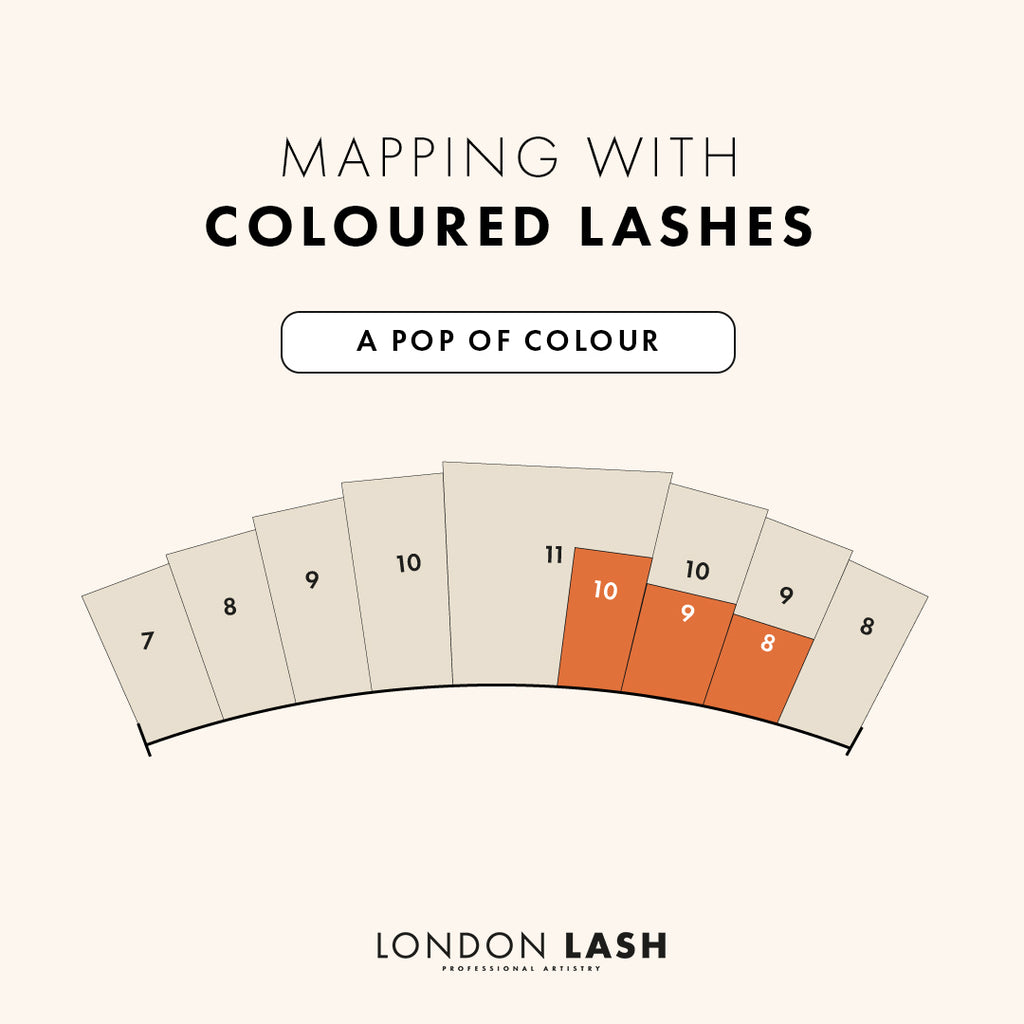
Style Two: A Pop of Colour
This can be done as bold or as subtle a colour as you’d like, but for this one, you’ll be adding a colour block near the outer corner of the eye. Our top tip with this is to apply a darker colour to at least the top layer of natural lashes, if not to the top and the middle. While we want the coloured lash extensions to really pop, if you’re using lighter colours especially it can create an optical illusion where the lashes look as though they have a large gap. By putting the coloured lashes in front of a darker backdrop, you’re keeping the whole set cohesive whilst still adding that little pop of colour!
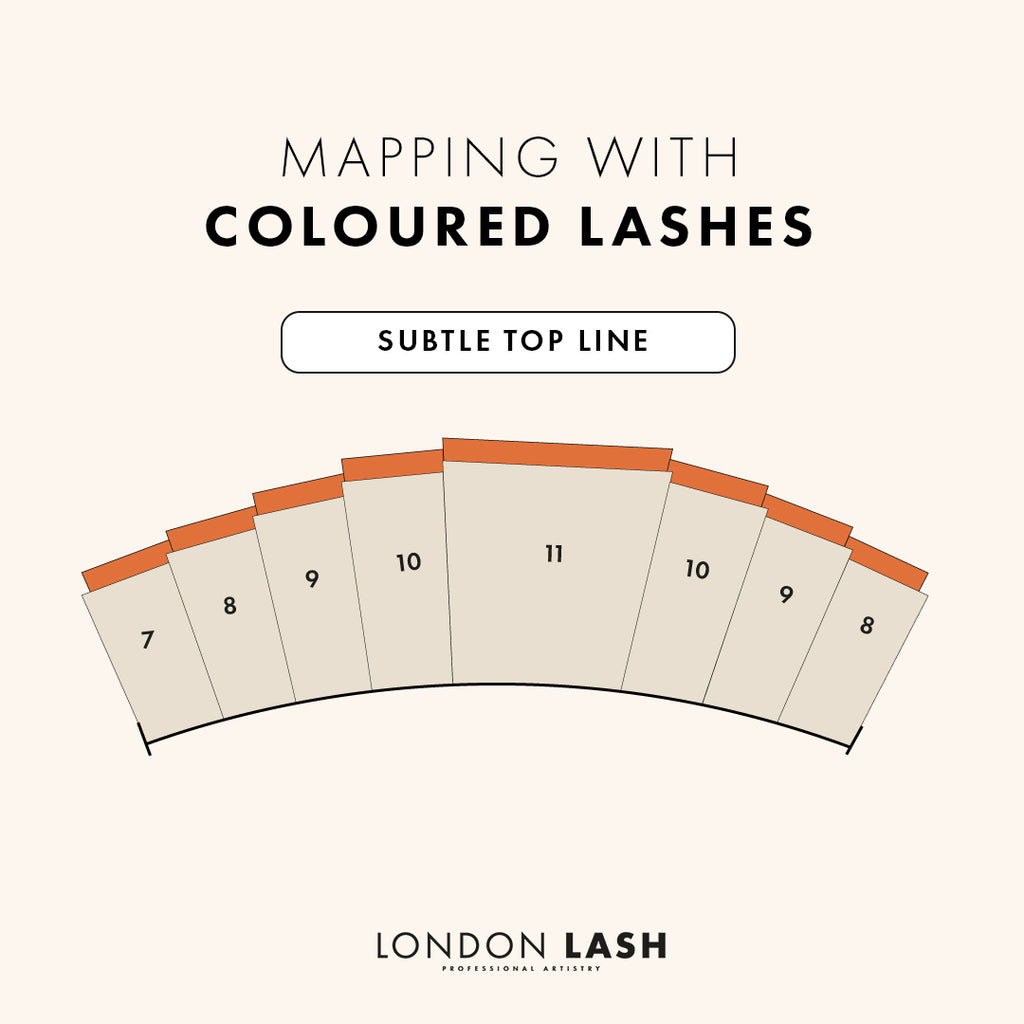
Style 3: A Little Peek!
A really cute way to play with coloured lashes is to apply the colour only to the top layer. While their eyes are closed it will look like a lot, but when they open their eyes you’ll just have a playful lash line with an otherwise regular-looking set of lashes.
It’s up to you how you want to play with the lengths here – if you use the same lengths for the top layer as on the other layers, you’ll only see the very tip of the coloured lash extensions as little wisps above the lane line, but if you apply the top layer 1 mm longer than the middle layer, you’ll see more of the lashes peeking above the rest of the set.
It’s also up to you how much of the top layer you want to cover with coloured lash extensions, on our map we’ve covered the whole lash line, but you could start from anywhere, depending on the kind of finished effect you’re going for.
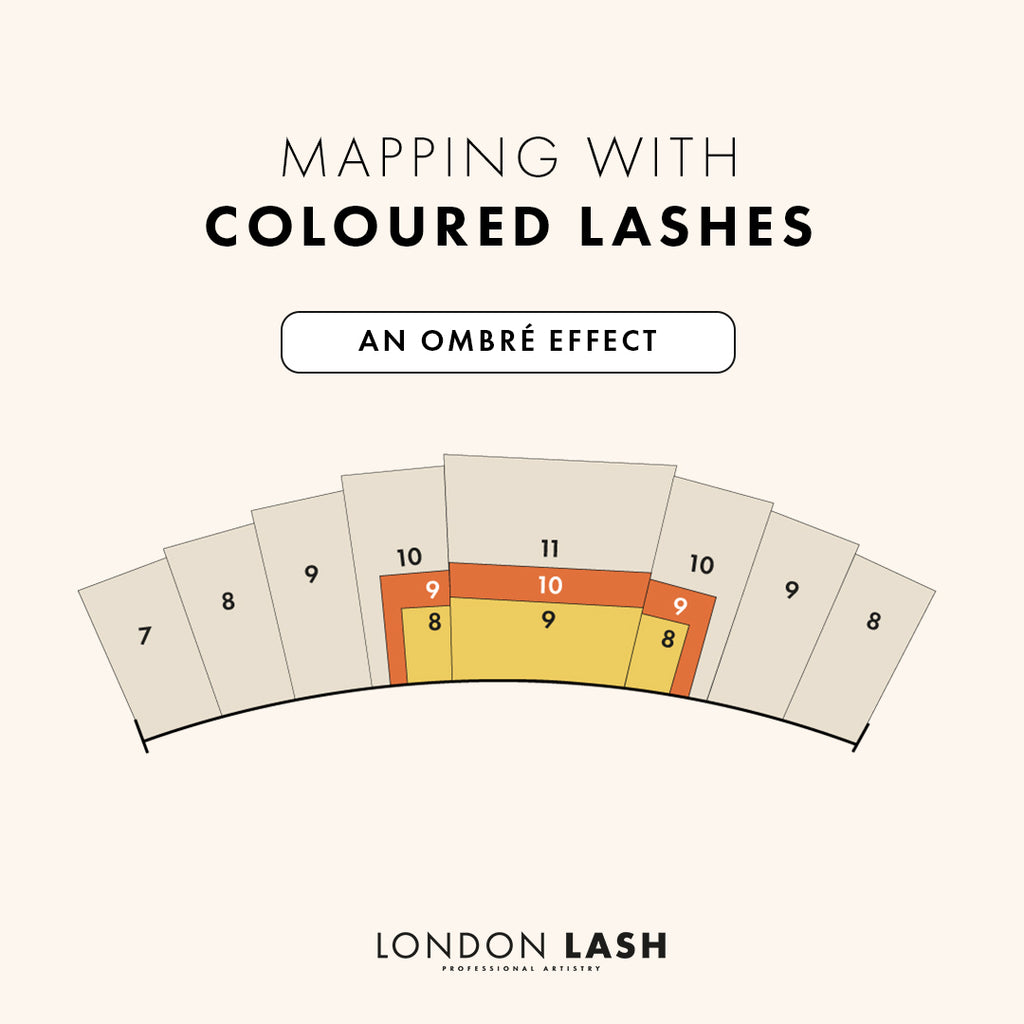
Style 4: The Ombré Effect
Like the others, this style involves working with the layers of the lashes. With this one though, you’re going to be using at least two colours to create an ombré effect.
Start your lash map as normal and decide where you’d like to include your coloured lashes – we’ve gone for the part under the brow arch, but you can do anything you like!
On the bottom layer of natural lashes, map where you’ll put your first colour (typically you’d pick the lighter shade here but you can do absolutely anything imaginable here), and then on the middle layer map your second colour, increasing the length of the lashes by a millimeter so that you can see both colours when your client opens their eyes. If you want to make the difference between the two colours more pronounced, you can choose lengths with more than a millimeters difference, but go by what your client would like the most.
With this effect, you can achieve a huge range of looks – pick a bright colour and its pastel counterpart for a light blend, or two contrasting colours for a more intense look. If you really want to turn heads, create an ombré effect using three colours either in one segment or all over the eye – it’s not every day you can create flame lashes for a client, so if they’re down for some adventure, run with it!
TOP TIP! When working with colored lash extensions, it can be a great idea to use a clear lash glue as this will blend seamlessly with the coloured lashes. Apply your coloured lashes from the bottom of the natural lashes so that the natural lashes are not visible when your client opens their eyes, making the colours more vibrant!
Check out the full range of coloured lash extensions here, and don’t forget to tag us in your creations on Instagram!


